

Data & backend
Payments
Take one-off payments or subscriptions with your own Stripe account — connect a key, register the webhook, and gate paid features.
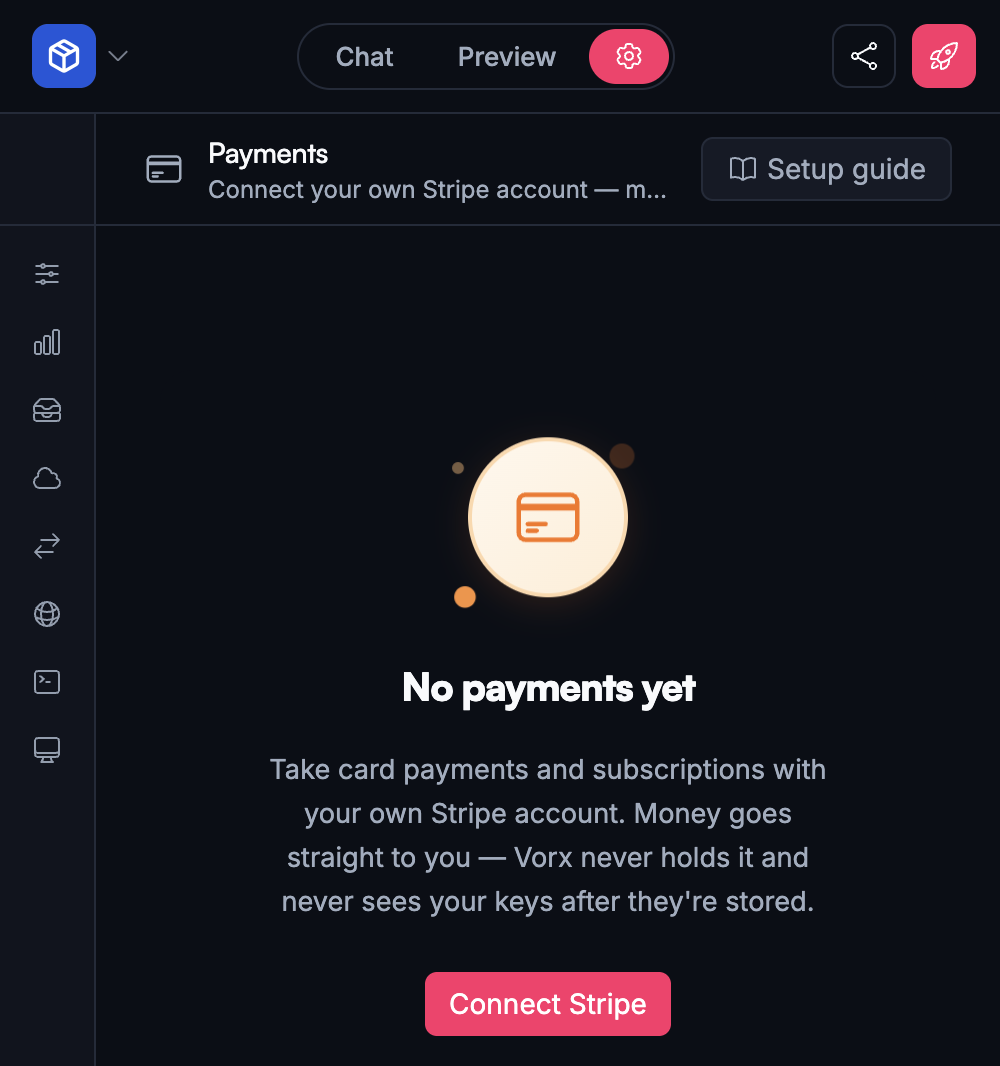
Take real money in your app with Stripe. You connect your own Stripe account, so payments land directly in it — Vorx never holds your money and never sees your keys again after they're stored.
You set this up in your project under Settings → Cloud → Payments. It takes two short visits to Stripe: one for a key, one for a webhook.
Before you start
- Your app needs a backend. Ask the assistant for accounts or a paid plan and a managed database is set up automatically. A static marketing site has nowhere to store what people bought.
- You need a Stripe account. Test mode works immediately on a new account — no business verification, no domain. You only need to activate the account when you want to charge real cards.
- You don't need to have set up products yet. Once your key is connected, Vorx can suggest a Free and a Pro plan based on what your app does and create them in your Stripe account for you. You can edit every part first, or skip it and make your own in Stripe.
Step 1 — Connect your key
In Settings → Cloud → Payments, choose Connect Stripe and paste a secret key (sk_…) or a restricted key (rk_…) from your Stripe dashboard.
A restricted key is the safer choice. It needs:
- Checkout Sessions — write
- Subscriptions — read
Don't paste a publishable key (pk_…) — it can't create a checkout, and Vorx will tell you so rather than letting you find out at the till.
Your key is stored encrypted and is readable only by your app's server code. It is never returned to the browser, never appears in your app's source, and never reaches the AI model.
Step 2 — Register the webhook
Stripe needs to tell your app what was paid for. Until it can, checkout will work but nobody will actually get access — so this step isn't optional.
Once your key is saved, the Payments panel shows a webhook URL. Vorx flags this as unfinished until you complete it.
- Copy the webhook URL from the panel.
- In Stripe, go to Developers → Webhooks → Add endpoint and paste it in.
- Subscribe the endpoint to
checkout.session.completedand thecustomer.subscription.*events. - Stripe shows a signing secret starting
whsec_. Copy it back into the panel.
That signing secret is how your app knows an event genuinely came from Stripe and not from someone who found the URL. Nothing is accepted without it.
Step 3 — Your plans
With Stripe connected, choose Suggest plans for me. Vorx proposes a Free and a Pro tier named for what your app actually does — with a price, a short description, and the things each tier gets.
Edit anything you like before committing: the name, the price, the description, and the bullet points. The free tier's price stays at 0.
Create these in Stripe makes them for real in your account. Nothing is created until you press it, and creating only ever adds — an existing product is never edited or deleted.
Your key needs write access to Products and Prices for this. If it doesn't have it, Vorx says so and you can either widen the key or create the products yourself in Stripe and skip this step.
If your app isn't the kind of thing people subscribe to — a brochure site, a one-off page — Vorx says there's nothing to suggest rather than inventing a plan you have no use for.
Step 4 — Put the plans in your app
Creating plans doesn't change your app. Your Stripe account now knows what you sell; your app still has to offer it.
The Payments panel gives you ready-made prompts written from your own plans — a pricing section for your landing page, a paywall on a feature, a billing screen in settings. Use this prompt drops one into the chat for you, and the assistant wires it up with your real prices.
Where things end up:
- Billing — the current plan, renewal date, and the upgrade button — goes in Settings, alongside your Team settings.
- A public pricing table goes on your landing page, for visitors who haven't signed up.
Your app already ships the pieces this uses — an upgrade button and a paywall that only shows paid content to workspaces that have paid. The assistant composes those rather than writing its own Stripe code, which is why no Stripe key ever ends up in your app.
Who the plan belongs to
A subscription belongs to the workspace, not to the person who happened to pay. Everyone on a team shares the plan their workspace bought — which is almost always what you want for a business tool, and worth knowing before you design around it.
Test before you ship
Use Stripe test mode while you build. Test keys look like sk_test_… or rk_test_…, and the Payments panel shows a Test mode badge so you always know which you're on.
Card 4242 4242 4242 4242 with any future expiry and any CVC completes a successful test purchase. Stripe publishes more test cards for declines and 3D Secure.
Nothing you do in test mode charges anyone. When you're ready, swap in live keys and register the webhook again on the live side — Stripe keeps test and live completely separate, including webhook endpoints.
Disconnecting
Disconnecting removes your keys from Vorx and stops checkout immediately; your app falls back to its free tier.
Existing subscriptions keep billing. They live in Stripe, not in Vorx, so cancel them in your Stripe dashboard if that's what you intend.
Where the money logic runs
Checkout and webhook handling run in backend functions, never in the browser. Your Stripe key stays server-side, and the record of what each workspace has paid for can only be written by Stripe's own verified events — not by the app, and not by anyone poking at it from a browser console.
Related
- Secrets — for other API keys your app needs. Stripe has its own panel; you don't add it here.
- Custom emails — send branded receipts from your own domain.
- Roles and permissions — who can change payment settings.